Download and Install
- In a browser window go to vpn.iit.edu.
- Log in using your Access Illinois Tech username and password. Do not change the Group dropdown.
- After clicking the Login button, it will autodetect your operating system and provide a download button.
- Click the Download for... button.
- Once downloaded, run the installer and follow the prompts.
Setup and Connect Using the Cisco AnyConnect for WINDOWS
- Launch the Cisco AnyConnect Secure Mobility Client.
If the dropdown next to the Connect button is blank, type in vpn.iit.edu.
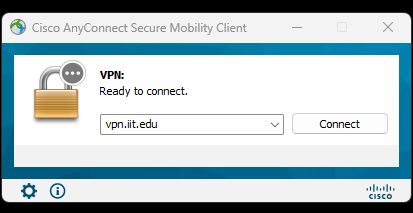
Click Connect.
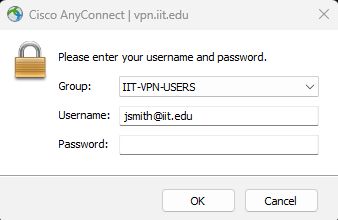
Enter the following information and then click OK:
For Mies and Rice Campuses:
- Group: IIT-VPN-USERS
- Username: your full university email
- Password: your Access Illinois Tech password
Multi-factor Authentication Using Okta Verify
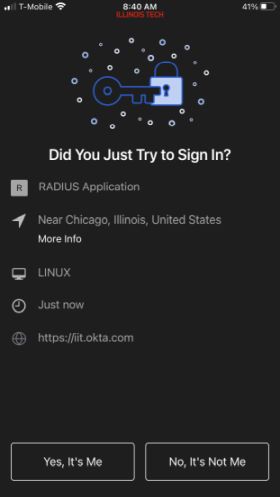
Okta Radius for VPN has its own default MFA option - the Okta Verify push notification.
- If you did not choose Okta Verify as one of your authentication methods when you set up your Access Illinois Tech account, please see the Multi-Factor Authentication Using Options Other Than Okta Verify below for step-by-step instructions.
- If you did choose Okta Verify as one of your authentication methods when you set up your Access Illinois Tech account, once you have entered the password and clicked ok, you will receive a popup on your mobile device, asking if you just tried to sign into the "Radius" application.
What if I Have Chosen the Okta Verify as My MFA Option, but It Is Not Available?
If you encounter problems using the Okta Verify app, you can change your multifactor authentication from Okta Verify to SMS or Voice CALL Authentication. Please be aware you will need to have these options enabled in your Access Illinois Tech account in advance to use them.
If you would like to use SMS authentication as your MFA, at Step 4 above, you would enter your password followed by ",SMS". For example, if your password is Abcd1234, you would enter "Abcd1234,SMS". Then you press "OK" and an SMS will be sent to the cell phone number you entered in your Access Illinois Tech account. The following screen will pop up on your computer:
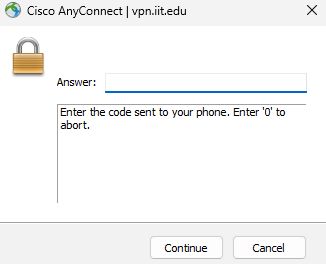
On this screen, enter the code that was sent via SMS. Click "continue," and you will be able to connect.
If you would like to use Voice CALL authentication as your MFA, at Step 4 above, you would enter your password followed by ",CALL". For example, if your password is Abcd1234, you would enter "Abcd1234,CALL". Then you press "OK" and you will receive a call on the number that you entered in your Access Illinois Tech account for this type of authentication. The following screen will pop up on your computer:

On this screen, enter the code that was communicated via the voice call. Click "continue," and you will be able to connect.
Multi-Factor Authentication Using Options Other Than Okta Verify
If you have not chosen Okta Verify as your MFA option, after you enter your password at Step 4 above and click "OK" you will be presented with the following window on your computer:
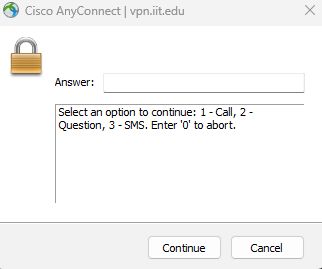
The window will contain those authentication methods that you did set up in your Access Illinois Tech account, i.e, "Call," 'Question," and/or "SMS" (text). Please choose one of the authentication options listed and follow the instructions to validate your identity/access.
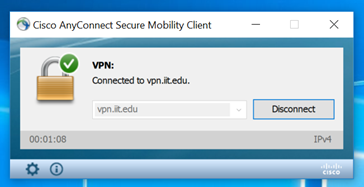
Disconnect from the IIT VPN
In the system tray area of your taskbar near the clock, click the Cisco AnyConnect icon.
![]()
At the prompt, click Disconnect.